


History, as the cliché claims, repeats itself. Consider this.
Between 4000 and 6000 years ago, the Sumerians began communicating using pictograms. In 1827, Joseph Niepce produced the first photographs on a metal plate. Eighty-eight years later, the motion picture camera was created, and in 1937 the first full-length animation feature was released. Since then, animation has transformed from a novelty to an art form. We regularly see animation in commercials, television, and movies.
The history of the Web is similar. When it was first released, Web pages could only contain text and links to other pages. In the early 1990s, a browser called Mosaic was released that added the ability to incorporate pictures and sound. This started a flurry of interest in the Internet. But after a while, even the carefully designed web pages with elaborate background images and colored text began to grow stale. Java, the most recent extension to the World Wide Web, allows programs to be added to Web pages.
Animations have been available on the Web since early versions of Mosaic, where Mosaic would download the MPEG file and launch a separate viewer. With the release of Netscape version 1.1, CGI files could use a push-and-pull method of creating animations. The browser would receive instructions to reread the information or read the next URL address after a set delay. The client could keep the connection open, and push new information onto the browser every so often. However, this type of animation was only available on Netscape, and it was slow. One of the popular uses of Java is to create animations. Because the Java animations are on the page, they serve to call attention to the Web page, rather than away from the page in the manner that a separate viewer does. Java is also faster than the Netscape method and will work on any browser that supports the Java.
This chapter covers
The design of simple animation systems is illustrated with animated text and images. This chapter covers double buffering, which is the easiest way to eliminate animation flicker. The advanced animation techniques include alternate designs to keep track of time, inbetweens, and backgrounds.
Before we dive into the programming of animation applets, let’s start with the hands down easiest way to create an animation: use someone else’s applet. Herb Jellinek at Sun Microsystems has created an Animator class, an applet that creates an animation. This class is provided as a demonstration program with the Java Developer’s Kit.
To use the Animator applet, do the following:
Table 25.1. Animator applet parameters.
Most of the tags are straightforward in their use, but some tags need additional explanation. We’ll begin with the images, and then describe how to use the tags that accept multiple inputs.
All image files used by the Animator class must start with the letter T followed by a number. For instance, if you have three GIF files that form the changing part of the animation, you could name them T1.gif, T2.gif, and T3.gif. The background image and startup image have no constraints on their names.
There are two ways to specify the order of the images. First, you could specify the first and last image with the STARTIMAGE and ENDIMAGE tags. If the value of the STARTIMAGE tag is greater than the value of the ENDIMAGE tag, the images are displayed starting STARTIMAGE and decrementing to ENDIMAGE. Second, you could specify the order of the images with the IMAGES tag. This tag takes multiple inputs, so let’s consider how to give multiple inputs to the Animator applet.
Several tags take multiple inputs. The Animator class has implemented these using a | as a separator between values. For instance, IMAGES requires the list of numbers of the images to be displayed. If you wanted to display the images 1, 3, and 2 in that order, you would write
<PARAM NAME=IMAGES VALUE=1|3|2>
SOUNDS works that same way except that values can be left blank. A blank value in the SOUNDS tag means that no sound is played for that image. PAUSES also takes multiple inputs, but if an input is left out, it defaults to the standard pause between images. For instance
<PARAM NAME=PAUSE VALUE=250>

<PARAM NAME=PAUSES VALUE=1000||4>
displays the first image for 1000ms (1000 milliseconds), the second image for 250ms, and the third image for 4ms.
The POSITION tag is a set of coordinates. As in the IMAGES and SOUNDS tags, the coordinates are separated by a | character. The x and y values of the coordinate are separated by an @ character. If a coordinate is left blank, the image remains in the same location as the previous image. For example, if you wanted to draw the first and second images at (30,25), and the third image at (100, 100), you would write
<PARAM NAME=POSITION VALUE=30@25||100@100>
| TIP |
|---|
You may want to add the following code to the Animator class after the paint() method and recompile the Animator class. void update (Graphics g) { paint (g); } The reason for this addition is that the default update() method clears the applet drawing area to lightGray before it calls the paint() method. Clearing the applet to gray first may cause your animation to flicker. |
The Animator class enables you to create an animation quickly and easily. If, however, you have more than one moving object or you would like to draw your objects as the animation runs, you will have to write your own animation applet. The next section begins with the design of an animator and gives four examples.
Let’s dive right into programming simple animations in Java. These animations might not be perfectly smooth in their presentation but will illustrate the basic design of an animation. We will also look at what makes a good animation. We’ll begin with creating an abstract animated object class, and then create several examples of the animation in action.
When writing a program in an object-oriented language, the first step is to decompose the problem into things that interact. The things, called objects, are grouped into classes of similar things. The class holds all the information about an object. Sometimes, classes are very similar, and a class can be created to represent the similarities of the class. This is called a base class. If the base class doesn’t actually store information, but provides a list of methods that all the members of the class have, the class is called a abstract class.
Java is an objected-oriented language, so in creating a design for a program, first find similarities in the components of the program. When designing an animation, we will begin by looking for similarities. Each image or text message that moves is an object. But if you consider these objects, you find that they are very similar. Each object needs to be able to paint itself in the applet window. In addition to painting the object, something about the objects is changing, or it wouldn’t be an animation. So the object must know when to change.
Let’s create a class with the following two methods:
Because a moving text object and an image have nothing in common other than these methods, I have created an abstract class as follows:
AnimationObject extends Object {

    public void paint (Graphics G)

    {

    //  Draw the object here

    }

    public void clockTick ()

    {

    //  Modify the object

    }

}
This skeleton enables you to simplify the design of the applet object. For instance, the paint() routine just erases the screen and sends each animation object a paint() method:
public void paint (Graphics g) {

        update (g);

        }

    public void update (Graphics g) {

        //  Erase the screen

        g.setColor (Color.lightGray);

        g.fillRect (0, 0, nWidth, nHeight);

        g.setColor (Color.black);

        //  Paint each object

        for (int ndx = 0; ndx < AnimatedObjects.length; ndx++)

            AnimatedObjects[ndx].paint (g, this);

        }
For now, we’ll assume that the update() method and the paint() method are essentially the same, although a description of the difference is given in the section on double buffering. The update() method is straightforward, but it may cause your animation to flicker. Code to fix the flicker is given in the section on double buffering.
The run() method is only three steps. First, the applet tells each object that one time unit has passed, and then the applet repaints itself. Finally, the program pauses.
public void run() {

        int ndx = 0;

        //  Set the priority of the thread

        Thread.currentThread().setPriority(Thread.MIN_PRIORITY);

        //  Do the animation

        while (size().width > 0 &&

               size().height > 0 &&

               kicker != null) {

            for (ndx = 0; ndx < AnimatedObjects.length; ndx++)

                AnimatedObjects[ndx].clockTick ();

            repaint();

            try { Thread.sleep(nSpeed); }

                catch (InterruptedException e) {}

            }

        }
The hard part is initially creating the applet, and that depends on how difficult it is to create each of the animation objects. So let’s start with moving text.
| NOTE |
|---|
| The code in this section is in Example 25.1 in file exmp25_1.java. |
Everyone has seen animated text, such as weather warnings that slide across the bottom of the TV screen during storms. We’ll start with an animation object that moves a text message around the applet drawing area and consider why this is effective.
Java provides the drawString (String s, int x, int y) routine in the java.awt.Graphics class that draws a string at a specific location. To animate text, the applet repeatedly draws the string at a different location.
If we wanted to scroll text across the applet, what would we need to store? First, you need a text message. For this example, let’s assume that the message only slides to the left. It’s easy to extend this code so that the message would also slide right, up, or down. In addition to the message, you would need some internal variables to store the x and y location of where the message should be printed next.
The next question is, “How do you compute when the message is no longer visible?” We need to know about the length of the message and the width of the applet to determine when the message disappears from view and where it should reappear. We won’t be able to determine the length of the message until we have the java.awt.Graphics object, so we’ll postpone this computation until the first time we paint() the text message.
Let’s begin by creating an object that stores each of these values:
class TextScrolling extends AnimationObject {

    //  Internal Variables

    String pcMessage;

    int nXPos;

    int nYPos;

    int nAppletWidth;

    int nMessageWidth;
Now we need to initialize these variables in the constructor method. The constructor needs the text message and the applet width. The other values are computed in the paint method.
public TextScrolling (String pcMsg, int nWide) {

        pcMessage = pcMsg;

        nAppletWidth = nWide;

        nMessageWidth = -1;

        nXPos = nWide;

        nYPos = -1;

        }
Use the drawString() method to draw the text message. The paint() routine is more complex, however, because we need to compute nYPos and nMessageWidth. The constructor assigned both of these variables the value -1 to flag them as unknown values. Now that a Graphics object is available, their values can be computed:
public void paint (Graphics g, Applet parent) {

        if (nYPos < 0) {

            //  Determine the y position

            nYPos = (g.getFontMetrics ()).getHeight ();

            //  Determine the size of the message

            char pcChars [];

            pcChars = new char [pcMessage.length() + 2];

            pcMessage.getChars (0, pcMessage.length() - 1,

                                pcChars, 0);

            nMessageWidth = (g.getFontMetrics ()).charsWidth

                                (pcChars, 0, pcMessage.length());

            }

        //  Draw the object here

        g.drawString (pcMessage, nXPos, nYPos);

        }
Now, whenever the clock ticks, the message shifts to the left. You can do this by adjusting the nXPos variable. We reset the nXPos whenever the message is no longer visible:
public void clockTick () {

        //  Do nothing until the message width is known

        if (nMessageWidth < 0)

            return;

        //  Move Right

        nXPos -= 10;

        if (nXPos < -nMessageWidth)

            nXPos = nAppletWidth - 10;

        }

//  END of TextScrolling Object

}
At this point, I could point out a lack of computation in the paint() and clockTick()methods and launch into a lecture on how it is important to avoid extensive computations. But either you already know that, or you would discover it very quickly with the first complex animation you write.
How can you avoid complex computations? Two possibilities follow:
In this animation object, the value of the variables nMessageWidth and nYPos were computed once in the paint() routine. Before then, the information wasn’t available.
Let’s consider some more examples. First, we will write two programs to display a series of images in an applet and to move a single image around an applet. These programs demonstrate the first possibility. For the second possibility, we draw and copy a stick person.
In the past ten years, computer animations of many different objects have been created using the physical equations that model movement. Interactions between rigid bodies are the easy to animate, but more advanced techniques have created realistic animations of rubber bands and elastic cubes that deform as they interact. The computations required for these are extensive and are not suitable for the online nature of applets.
The first animation object uses the flipbook principle of animation. For this method, generate all the pictures in advance, and allow Java to display the images in sequence to create the illusion of motion. The second method is useful for rigid body motion and interactions, where we take a single image and move it around the applet drawing area.
But first, let’s review some information about images.
Images take a while to load into the computer’s memory, and they look very strange if you display them before they are completely ready. Have you ever seen the top of a head bouncing around a Web page? Very unnerving :-) To avoid this gruesome possibility, the creators of Java have provided a MediaTracker class. A MediaTracker object enables you to determine if an image is correctly loaded.
| NOTE |
|---|
| Though a MediaTracker will eventually be able to determine if an audio objects has loaded correctly, it currently only supports images. |
The MediaTracker object provides three types of methods:
The methods that register images are named AddImage:
You can organize images with the group number. This enables you to check logical groups of images at once.
The methods to start the images loading follow:
| NOTE |
|---|
| In checkAll() and checkID(), the last input is true. This is not a variable, but the Boolean constant. |
Because the routines that start with check return immediately, you can continue with other processing and occasionally check the progress with checkID(groupNumber) and checkAll().
The final two methods follow:
Now we are ready to start working with the image object animators. We’ll begin with a changing image animation, and then we’ll create a moving image animation.
The flipbook method of animation in Java is the most popular on Web sites. Flipbooks contain pictures but no words. The first picture is slightly different from the second, and the second picture is slightly different from the third. When you thumb through a flipbook as shown in Figure 25.1, the pictures appear to move. In this section, we create an applet that takes a series of images, and repeatedly displays them in the applet window to create the illusion of motion.
| NOTE |
|---|
| The code in this section is in Example 25.2 in file exmp25_2.java on the CD-ROM. |
Thumbing through a flipbook creates the illusion of motion.
This program needs to store two values: the images to be displayed and the MediaTracker to determine if the images are ready. Internally, we will also keep track of the number of the image to be displayed next:
class ChangingImage extends AnimationObject {

    //  Internal Variables

    Image ImageList [];

    int nCurrent;

    MediaTracker ImageTracker;
The constructor initializes the variables with the constructor’s inputs, and starts the animation sequence with the first image:
public ChangingImage (Image il[], MediaTracker md,

                Applet parent) {

        ImageList = il;

        nCurrent = 0;

        ImageTracker = md;

        }
As mentioned earlier, it is important to check that the image is available before it is drawn:
public void paint (Graphics g, Applet Parent) {

        //  Draw the object here

        if (ImageTracker.checkID(1)) {

            g.drawImage (ImageList [nCurrent], 100, 100, Parent);

            }

        else

            System.out.println

                (“Not Ready Yet “ + (nCurrent+1));

        }
Remember that this object is only one part of a possibly large animation, and you may need to sacrifice the first few pictures to keep all the parts of the animation together. Therefore, the object doesn’t check the ImageTracker to see if the images are ready in the clockTick method:
public void clockTick () {

        nCurrent++;

        if (nCurrent >= ImageList.length)

            nCurrent = 0;

        }

//  END of ChangingImage Object

}
With this approach, most of the work is done ahead of time, either as you draw all the images or by a computer program which generates and saves the images. This method is how you animate objects with elastic properties or realistic lighting in Java because of the amount of computation involved.
| NOTE |
|---|
| The code in this section is in Example 25.3 in file exmp25_3.java. |
For rigid bodies, there is an easier way to create a 2D animation: you can take an image of the object and move it around the applet drawing area. An example of a rigid body is a rock or a table because they don’t deform or change while they move. A cube of gelatin wiggles as it moves, and deforms when it runs into another object.
The MovingImage class is very similar to the ChangingImage class in previous section. The variables are a picture and the X and Y locations where it will be drawn. In this object, the nCurrent variable keeps track of the location in the object’s path, rather than the image:
class MovingImage extends AnimationObject {

    //  Internal Variables

    Image Picture;

    MediaTracker ImageTracker;

    int nCurrent;

    int pnXPath [];

    int pnYPath [];
The constructor for MovingImage is nearly identical to the constructor for ChangingImage, except it has two extra variables to save:
public MovingImage (Image img, MediaTracker md,

                int pnXs [], int pnYs [],

                Applet parent) {

        Picture = img;

        nCurrent = 0;

        ImageTracker = md;

        pnXPath = pnXs;

        pnYPath = pnYs;

        }
Now instead of changing images, we simply draw the image at the next location in the path:
public void paint (Graphics g, Applet Parent) {

        //  Draw the object here

        if (ImageTracker.checkID(1))

            g.drawImage (Picture,

                         pnXPath[nCurrent], pnYPath[nCurrent],

                         Parent);

        }
The clockTick() program is nearly identical to the method written for the ChangingImage object.
| NOTE |
|---|
| The code in this section is in Example 25.4 in file exmp25_4.java. |
Remember that we are trying to minimize the amount of computation that we perform during an animation. If we don’t have an image that we can use, we have to draw the image using graphic primitives. So let’s say that we want to slide a stick figure across the applet. Here is a small method that draws a stick person at a specified location:
public void drawStickFigure (Graphics g, int nX, int nY) {

        g.drawOval (nX +  10, nY +  20, 20, 40);

        g.drawLine (nX +  20, nY +  60, nX +  20, nY + 100);

        g.drawLine (nX +  10, nY +  70, nX +  30, nY +  70);

        g.drawLine (nX +  10, nY + 150, nX +  20, nY + 100);

        g.drawLine (nX +  20, nY + 100, nX +  30, nY + 150);

        }
The original stick figure is drawn in black on a lightGray background. To continue the animation, we can erase it by redrawing the figure in lightGray over the black figure, then draw a new figure in black a little to the right. For such an uncomplicated drawing, this method is effective. For the purpose of this illustration, however let’s animate the stick figure using the copyArea() method:
public void paint (Graphics g, Applet Parent) {

        if (bFirstTime) {

            bFirstTime = false;

            drawStickFigure (g, nX, nY);

            }

        else {

            g.copyArea (nX, nY, 35, 155, 5, 0);

            }

        }
The first time the paint() method is called, the figure is drawn using the drawStickFigure routine. After the first time, the paint() routine recopies the stick figure a few pixels to the right. To erase the old copy of the figure, some blank space is copied with the stick figure. The result: the figure slides across the applet.
There is one problem with this animation so far. Our previous animations would repeatedly cycle across the screen. Once our little figure is out of the viewing area, it is gone for good. If only there was a way to draw an image in Java, and save it. Then we could use the animation techniques in the previous section to move the image around the applet drawing area.
Fortunately, such a facility is available in Java. In addition to enabling us to create an image off-line so that it can be used repeatedly, this facility generates a cleaner flicker-free animation.
In order to double buffer your animation, you
| NOTE |
|---|
| An example illustrating the flickering effect and the improvement created by using double buffering is in Example 25.5 in file exmp25_5.java on the CD-ROM. |
The first step requires that you create an image in which you will do all the work. To create the off-screen image, you must know the height and width of the drawing area. Once that is determined, you can get the graphics object from the image with the getGraphics() method:
offScreenImage = createImage(width, height);

    offScreenGraphic = offScreenImage.getGraphics();
The graphics object extracted from the image is now used for all drawing. This part is the same as the paint() program in the “Simple Animation” section, except instead of using g you use offScreenGraphic:
//  Erase the screen

    offScreenGraphic.setColor (Color.lightGray);

    offScreenGraphic.fillRect (0, 0, width, height);

    offScreenGraphic.setColor (Color.black);

    //  Paint each object

    for (int ndx = 0; ndx < AnimatedObjects.length; ndx++)

        AnimatedObjects[ndx].paint (offScreenGraphic, this);
Finally, you need to copy the off screen image into the applet’s graphics object:
g.drawImage(offScreenImage, 0, 0, this);
And you have now succeeded in improving the clarity of your animation. You might be wondering why this would improve the animation. After all, the number of pixels that are drawn has increased! There are three reasons for this improvement:
Now we have reduced the flicker by creating an off-screen image. In the first section, the theme was to reduce the computation that the applet performed. Using the off-screen image increased the computations, but improves the visual effect. Now we will eliminate extra computations in the program using the off-screen image.
Earlier, I said that paint( ) and update( ) were essentially the same. In fact, most of the sample code that Sun Microsystems provides does exactly what I did in the “Simple Animation” section: the paint( ) method calls the update( ) method. So what is the difference?
The paint( ) method is called when the applet begins execution and when the applet is exposed. An applet is said to be exposed when more area or different area can be viewed by the user. For example, when an applet is partially covered by a window, it needs to be redrawn after the covering window is removed. The removal of the covering window exposes (change the screen to enable the user to see more of a viewing area of a window) the applet. See Figure 25.2 for an example.
Moving another window exposes the applet.
Update is called whenever a repaint( ) method is called. For instance, in the run( ) method of the applet, a repaint( ) method is called on every iteration through the loop.
So what does that mean? If the paint( ) method calls update( ) method, the applet does extra work by recomputing what the image should be. Yet less than a second ago, update( ) created a perfectly good picture, and it is still available for paint( ) to use. It is better if the paint( ) method copies the image created by update( ) onto the screen again.
Here is a more efficient pairing of paint( ) and update( ):
public void paint (Graphics g) {

        if (offScreenImage != null)

            g.drawImage(offScreenImage, 0, 0, this);

            }

    public void update (Graphics g) {

        if (offScreenImage != null) {

            //  Erase the screen

            offScreenGraphic.setColor (Color.lightGray);

            offScreenGraphic.fillRect (0, 0, nWidth, nHeight);

            offScreenGraphic.setCOlor (Color.black);

            //  Paint each object

            for (int ndx = 0; ndx < AnimatedObjects.length; ndx++)

                AnimatedObjects[ndx].paint (offScreenGraphic,

                                            this);

            g.drawImage(offScreenImage, 0, 0, this);

            }

        }
| TIP |
|---|
| One problem with this approach is that the paint() method is called as the applet begins running. At this time in the execution of the applet, there is no image to display because update() has not yet been called. The effect: the first screen that the user sees is a filled white rectangle that covers the entire applet. You can remedy this by printing a text message in the off-screen image when it is created. |
The double buffered approach is one of the most widely used algorithms to improve animation. Part of the reason that this algorithm is widely used is the ease of implementing it. The next section discusses other widely used algorithms that help improve your animation.
Here you learn about three tactics for better animations. First, time is essential to animations, and how you organize it can greatly simplify the program. Second, you learn about inbetweens, which reduce the amount of time you spend creating the animation. Third, backgrounds provide an alternative method to erase the screen and spice up the animation.
The single most obvious feature in animation is that objects move. To have motion, there must be a concept of time. In this section, we’ll consider three ways of implementing time and when they should be used.
The animation in the first section of this chapter, each moving object received a clockTick method for each time period. This is very useful for most animations, where objects are continually changing and there is a cycle in the object.
One example of this type of animation is juggling a ball. Each ball follows a single path. The motions of the hands also follow a path. But the lengths of the ball path and the hand path are different. Therefore, each object should store where it is in its path.
You can use the design described in the Simple Animation section for this type of design.
For other objects, what the object draws is easy to compute from the length of time the animation has run. An animation of a space ship entering the atmosphere or a running stop watch would be good examples of this type.
To use this type of time, you should create an AnimationTime object. This object receives clockTick() methods from the applet’s run method. It will also return the current time when a now() method is sent to it. This code follows:
public class AnimationTime {

    int nCurrentTime = 0;

    public void clockTick ( ) {

        nCurrentTime++;

        }

    public int now ( ) {

        return nCurrentTime;

        }

    }
The run( ) method in your applet is elementary, because you only need to send a clockTick( ) method to the AnimationTime object. The changing objects in the animation no longer receive a clockTick( ) method from the run method. In the paint( ) method of the changing objects, the current time is queried from the AnimationTime object with the now( ) method.
An event queue is a commonly used technique of keeping track of time in a simulation. An event queue is an ordered list of actions. The list is ordered according to when the action will occur. If multiple actions occur at the same time, they are stored in the order that they were added to the event queue. In other words, an event queue queues up the events in chronological order. This approach is very useful for simulations in which actions may occur at irregular times. An event queue animation is useful if the changes in the applet do not occur in even intervals.
These implementations of time ease the creation of animation applets. There are two other common animation algorithms that can reduce the amount of time you spend creating the animation. The first is the use of inbetweens. When using inbetweens, you don’t need to specify where the image will be at every time step. Instead, the computer determines where to draw the image. The second is the use of background images.
When the first movie length animation was finished, it required over two million hand-drawn pictures. Because there were only four expert artists, it would have been impossible for these people to create the entire film. Instead, these artists drew the main or key frames (the frames specified by the creator of the animation). Other artists drew the inbetween frames (frames created to move objects between their key positions).
This approach is used today to create animations, except now the computer creates the inbetween frames. Generally, a computer needs more key frames than a human artist, because computers don’t have common sense knowledge about how something should move. For instance, a falling rock increases speed as it falls, which is obvious, but a computer does not know this obvious fact. You can compensate for the computer’s lack of common sense by specifying how the objects move between key positions. Four common trajectories are shown in Figure 25.3.
 FIGURE 25.3.
These graphs show four different trajectories for moving objects.
To see how inbetweens work, consider Figure 25.4, which shows a ball moving upwards using the acceleration trajectory from Figure 25.3. At first, the ball object moves slowly, but thedistance between successive positions of the ball slowly increases. The successive positions of the balls are numbered, with 1 being the starting image, and 10 being the final image.
 FIGURE 25.4.
The motion of an image corresponds to the location on the trajectory graph.
Inbetweens reduce the amount of information an animation artist must enter to create the desired animation. The next section presents a few hints for using a background image. Basically, a background image is a combination all the unchanging pictures into one image which is displayed in the background. Using a background can reduce the computations involved in the animation.
Another trick that animators use is to draw the background on one sheet of paper, and then draw the characters and moving objects on a piece of plastic. The background remains the same and it is drawn once. By overlaying different the plastic pictures, the illusion of movement can be created. The same trick can be used with a computer. You first create a background image and save it. Then, instead of erasing the image with the fillRect(), you use copyArea() or drawImage() to initialize the off-screen image and draw the moving parts on top.
The borders of your moving images should be transparent just as if the characters were drawn on plastic. One program to erase the borders is called giftrans, and it is available at anonymous ftp sites. One site is
http://www-genome.wi.mit.edu/WWW/tools/graphics/giftrans/
This site contains a DOS executable file, for computers that can open a DOS window, and the C source code for other systems that have a C compiler. Many more sites have this file, and you can find at least 20 more by searching Lycos with the keyword giftrans.
Now let’s take all the ideas that we have discussed in this chapter and make a multiple object animator. (The full source code is provided in the CD-ROM.) In this section, we’ll see some of the highlights. First, we want the code to be able to read from the HTML file the number and motion of the animation objects. Second, I’ll review how some of the advanced animation techniques are used in this example.
To enable the program to read the motion specifications from the applet tag, we need to do the following:
The first step is to store the images and the animation objects in a vector. The applet then dynamically stores however many objects or images there will be in the animation. For more information about how to use a vector, see Chapter 31, “Extending Java with Content and Protocol Handlers.”
The effect of an AnimatedImage object is a moving changing picture. It needs an array of images and two arrays for the path the object travels. However, the AnimatedImage object sometimes is used as a ChangingImage object, and it would be easier on the user if numbers could be passed for the path variables. The constructor has been overloaded for this purpose. The other change is the use of a vector to store the images, which allows us to store an arbitrary number of images.
The init( ) method is standard, but the applet generates the tags it needs as it runs. It does this by concatenating strings with numbers:
String at = getParameter (“IL” + 3);
This enables us to load an arbitrary number of animation objects. For the tags and what they mean, consult Table 25.2.
Table 25.2. Tags for Example 25.7.
| TAG | Description |
|---|---|
| IL? | Image letter, what should prefix the image file names |
| IC? | The number of images |
| IO? | Image offset, which image should you start with |
| KF? | The number of key frames |
| X?_? | The x coordinates of the key frame |
| Y?_? | They coordinates of the key frame |
| XT?_? | The type of motion between X values |
| YT?_? | The type of motion between Y values |
| W?_? | The number of points between values |
The first ? in the tag refers to the number of the animated object. The second ? in the tag is the number of the frame. For instance, X3_7 refers to the x value of the third animated object in the seventh key frame.
Now, let’s consider some of the advanced techniques and how they were used in this example. This program provides the functionality to create inbetweens and to use a background image. To keep the animation from flickering, this code also uses the double buffered approach to painting the image.
The paths of the moving objects are specified in the HTML file, but they are filled in as suggested by the user with the InBetweenGenerator object. This object requires three values: the key locations, how many frames to produce between each set of key locations, and the type of motion between each key location. It then generates an array of integers that represent the path that object traverses. To extend the InBetweenGenerator object to create another type of motion between end points, rewrite the interpolation() method to include your new motion. All the equations in this method take a number between 0 and 1, and return a number between 0 and 1. However, if you want the object to overshoot the source or the destination, you can create equations that produce values outside of that range.
Notice that a background image is an image that doesn’t move and doesn’t change. So to create a background for the animation, you just make the background image the first animated object.
In this chapter, we created the AnimationObject base class that simplifies the design. This animation class was then used to create moving text, flipbook style animation, and moving image animation. Double buffering was used to eliminate flicker, and we discussed the difference between the paint() and update() methods. Alternate designs for time keeping were discussed briefly. The final algorithms discussed were the use of inbetweens and background images.
What really launched Java into the spotlight for many people was the ability to perform animations on the World Wide Web. With the release of Netscape 2.0, Java is not the only way to create animations on Web pages. Increasingly, there are specialized programs that help you create animations that can be visible on Web pages. One of these is Shockwave for Director, which enables you to create animations in director, and Shockwave allows the animations to be viewed. VRML is language to specifies three dimensional animations, by specifying the locations objects and a viewing path. VRML currently requires special graphics hardware to view. Thus, Java is still the least expensive way to create an animation.
Here are some web sites that you can browse that have more information about animations. The best collections of Java applets is Gamelan, and it has a page on animations. The URL is
http://www.gamelan.com/Gamelan.animation.html
These sites have many links to animations. Viewing some of these sites can give you ideas for your animations:
More information about animation can be found at
http://java.sun.com/people/avh/javaworld/animation/
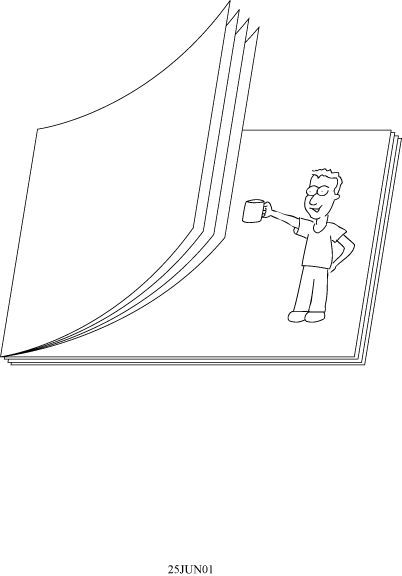 FIGURE 25.1.
 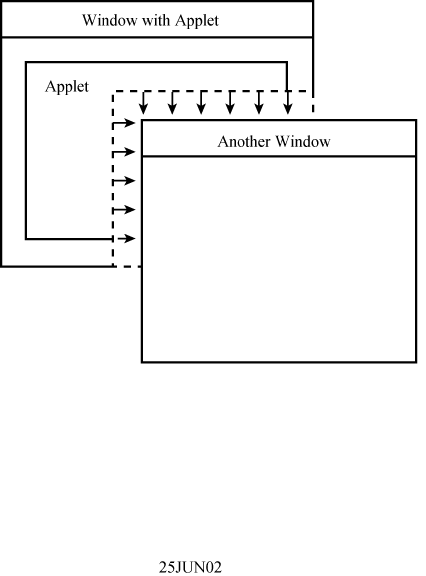 FIGURE 25.2.